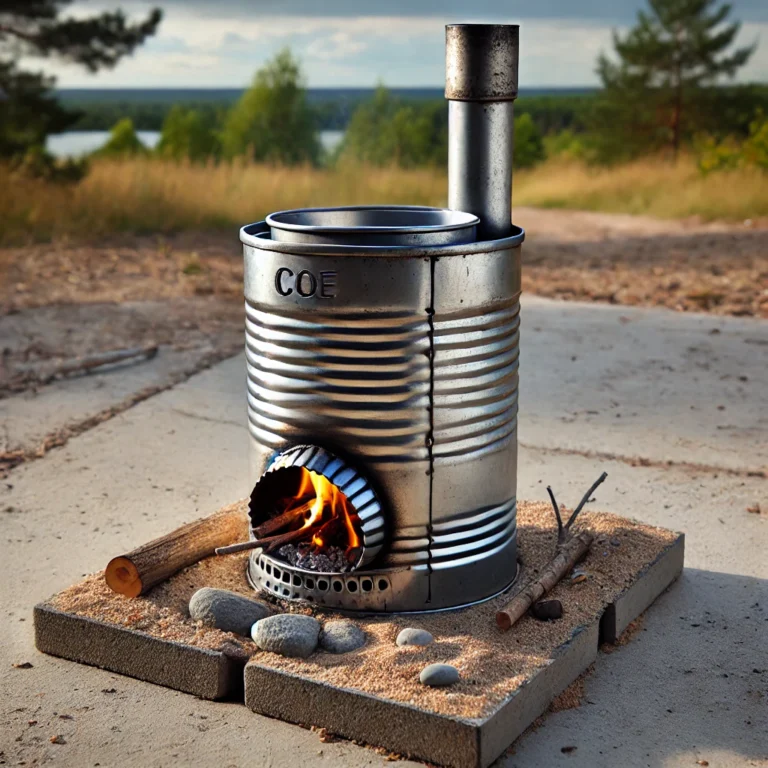
Building a rocket stove is a fun and practical project that anyone interested in prepping, survival skills, or just being resourceful can enjoy. Not only is it an efficient way to cook food or boil water during emergencies, but it’s also a great way to reuse scrap materials lying around your garage or yard. By the end of this guide, you’ll have a fully functional rocket stove ready to fuel your outdoor adventures or preparedness plans.
What is a Rocket Stove?
A rocket stove is a small, portable, and highly efficient cooking stove. Its design allows for intense heat with minimal fuel. It operates by channeling airflow to create a concentrated flame, making it an excellent choice for cooking or heating water without wasting energy. The best part? You can build one using scrap materials that you probably already have!
Why Build a Rocket Stove?
For anyone serious about self-reliance, a rocket stove is a must-have. Here’s why:
- Efficiency: It uses small twigs, branches, or biomass as fuel, making it ideal for off-grid living.
- Portability: A DIY rocket stove is lightweight and easy to transport, perfect for camping or emergencies.
- Eco-Friendly: It promotes upcycling and reduces reliance on fossil fuels.
- Versatility: Use it to cook meals, boil water, or even keep warm in cold weather.
Gather Your Scrap Materials
To build a rocket stove, you’ll need a few basic items that are often found in scrap piles or recycling bins. Here’s a list to get you started:
- Metal can or bucket: A large tin can, paint bucket, or steel drum works as the stove body.
- Smaller metal pipe or can: For the chimney and feeding tube.
- Insulation material: Sand, gravel, or even ash can work.
- Metal cutting tools: Tin snips, an angle grinder, or a sturdy pair of shears.
- Safety gear: Gloves and goggles for protection.
If you don’t have all these materials lying around, don’t worry. A quick trip to a junkyard or a chat with neighbors might turn up exactly what you need.
Step-by-Step Instructions
Step 1: Prepare the Main Body
Start by choosing your main stove body. A large metal coffee can, a five-gallon paint bucket, or even an old fire extinguisher can be repurposed for this. Clean it thoroughly to remove any residues, and then mark where the feeding tube and chimney will go.
Using your cutting tool, carefully create a hole at the bottom of the can for the feeding tube. Ensure the hole is slightly smaller than the pipe to create a snug fit.
Step 2: Add the Feeding Tube
The feeding tube is where you’ll insert the wood or biomass. Take a smaller metal pipe or can and fit it into the hole you just cut. Angle it slightly upwards for better airflow. Secure it in place using screws or metal adhesive if needed.
Step 3: Install the Chimney
Next, you’ll need to create a vertical chimney inside the can. This directs the flames and heat upward for efficient cooking. Cut another hole on top of the stove body and insert a vertical pipe. Make sure it aligns well with the feeding tube for optimal airflow.
Step 4: Add Insulation
Insulation is key to a rocket stove’s efficiency. Fill the space around the chimney and feeding tube with your chosen material, such as sand or ash. This not only retains heat but also ensures the outer surface stays cool to the touch.
Step 5: Build the Top Surface
The top of your stove should be flat and sturdy to support pots and pans. If the main body doesn’t already have a flat surface, you can add a metal grate or plate. Make sure there’s enough room for flames and heat to escape while supporting your cookware.
Tips for Using Your Rocket Stove
- Fuel Selection: Dry twigs and small branches work best. Avoid damp wood as it reduces efficiency.
- Lighting the Fire: Start with small tinder and kindling before adding larger pieces of fuel.
- Cooking Tips: Use pots or pans with flat bottoms for even heat distribution.
Creative Ways to Customize
Once you’ve built your basic rocket stove, consider these add-ons to enhance its functionality:
- Paint for Durability: Use heat-resistant paint to protect against rust and wear.
- Portable Handles: Add metal handles for easy transport.
- Storage Compartments: Attach a small box for keeping dry wood nearby.
Why Rocket Stoves are Perfect for Preppers
Rocket stoves align perfectly with the prepping philosophy. They’re compact, require minimal fuel, and work without electricity. Whether you’re camping, bugging out, or facing a power outage, a rocket stove ensures you can cook and sterilize water anywhere.
Safety First
While rocket stoves are easy to use, always prioritize safety:
- Ventilation: Use your stove outdoors or in a well-ventilated area to prevent carbon monoxide buildup.
- Protect Surfaces: Place it on a non-flammable surface like bricks or concrete.
- Supervise: Never leave the stove unattended, especially around children or pets.
Building a rocket stove from scrap materials is not only satisfying but also incredibly useful. It’s a project that empowers you to rely on your resourcefulness while creating something practical. Whether you’re a seasoned prepper or someone who loves DIY projects, this is a skill worth adding to your repertoire.
So, gather those scrap materials, fire up your tools, and get started on your rocket stove today. You’ll not only enjoy the process but also gain a valuable tool for your preparedness arsenal.


