A solar still is a lifesaving tool that uses the sun’s power to extract clean water from virtually any source. Whether you’re hiking in the desert, prepping for emergencies, or simply curious about survival skills, building a solar still is a simple yet essential technique. With just a few basic materials and a sunny spot, you can stay hydrated in some of the harshest conditions.
What is a Solar Still?
A solar still is a device that purifies water through the natural process of evaporation and condensation. The sun heats up a source of moisture, causing water to evaporate and separate from impurities like salts, bacteria, and debris. As the vapor cools, it condenses on a surface and drips into a collection container, leaving behind clean, drinkable water.
Solar stills are perfect for emergency situations, particularly in arid climates where fresh water is scarce. Best of all, you can build one using items you likely already have in your home or backpack.
Why Learn to Build a Solar Still?
When you’re in a survival situation, water is your top priority. The human body can only survive about three days without water, and in hot, dry climates, dehydration sets in quickly. A solar still is a simple, reliable method to obtain clean water when you need it most.
Beyond survival, mastering the art of building a solar still teaches valuable self-reliance skills. It’s a practical project for campers, preppers, and outdoor enthusiasts. Plus, it’s a fun and educational activity for kids and families looking to explore renewable energy and survival science.
How to Build Your Own Solar Still
Let’s dive into the steps for creating a basic solar still. Whether you’re in a backyard or a barren landscape, these instructions will guide you through the process.
Materials Needed:
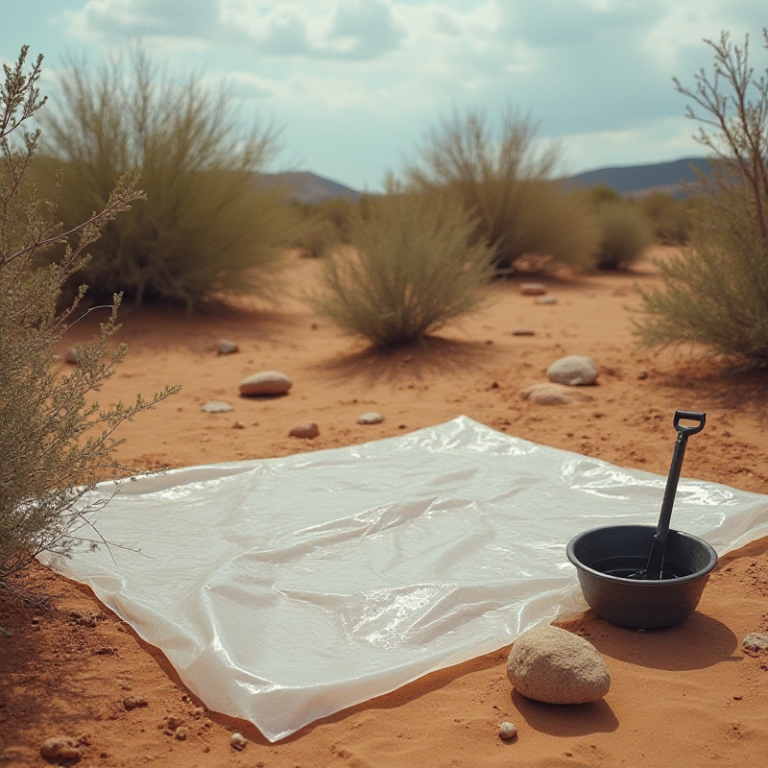
- A clear plastic sheet or tarp
- A container or bowl to collect water
- A small rock or weight
- A digging tool (like a shovel or even your hands)
- Optional: A piece of tubing for easier drinking
Step 1: Choose Your Location
Pick a sunny spot where the ground is rich in moisture. In arid climates, areas near vegetation or low-lying ground often have hidden moisture beneath the surface. If no moisture-rich soil is available, you can use damp plants, fruits, or even urine as a water source.
Step 2: Dig Your Hole
Dig a hole about 3 feet wide and 2 feet deep. The size of the hole determines how much water your still can produce, so aim for a balance between effort and yield.
Place your water source in the center of the hole. This could be wet soil, plants, or even saltwater in a separate container. The more moisture you provide, the more water you’ll collect.
Step 3: Position Your Collection Bowl
Put your container or bowl at the bottom of the hole’s center. This will catch the clean water that condenses and drips down. If you have a piece of tubing, place one end in the bowl and leave the other end accessible above ground for easier drinking.
Step 4: Cover the Hole with Plastic
Stretch the clear plastic sheet over the hole, securing the edges with rocks or dirt to prevent air from escaping. Make sure the plastic is taut and slanted slightly downward toward the center, where the bowl is located.
Place a small rock or weight on the plastic directly above the bowl. This creates a dip in the plastic, guiding the water droplets into your collection container.
Step 5: Wait and Collect
Now, let the sun do its magic! Over the next several hours, solar energy will heat the moisture source, causing water to evaporate. The vapor will condense on the underside of the plastic sheet and drip into the bowl.
In ideal conditions, a solar still can produce up to a quart of water per day. While this may not sound like much, it can make all the difference in a survival scenario.
Tips for Maximizing Water Collection
- Increase Moisture: Add more wet material, such as green plants or additional water sources, to boost yield.
- Use Multiple Stills: Building several solar stills can significantly increase your water supply.
- Time it Right: Start early in the day to maximize sunlight exposure.
- Stay Shaded: While your still collects water, conserve energy and stay out of the sun to reduce dehydration.
Variations of the Solar Still
Once you’ve mastered the basic solar still, try these variations for specific scenarios:
- Plastic Bottle Solar Still: If you don’t have digging tools, use a clear plastic bottle. Cut it in half, place moist material inside, and invert the top to act as a funnel.
- Saltwater Solar Still: Great for coastal areas, this setup uses saltwater as the moisture source. While less efficient, it can provide vital drinking water in a pinch.
- Emergency Poncho Still: Use a poncho or plastic raincoat as the covering material in your still. This is a great option for hikers who carry lightweight gear.
The Science Behind the Solar Still
Understanding the science of a solar still can deepen your appreciation for this simple yet effective tool. The process of evaporation and condensation mimics the natural water cycle. Sunlight provides energy to turn liquid water into vapor, leaving impurities behind. When the vapor cools, it returns to liquid form as pure water.
This method works because most contaminants, such as bacteria, salts, and chemicals, don’t evaporate with the water. As a result, solar stills produce clean water even from questionable sources.
Stay Prepared: Solar Stills and Beyond
Learning how to build a solar still is just one step in staying prepared for emergencies. Here are a few additional tips:
- Carry Emergency Gear: Always pack a plastic sheet, a container, and tubing in your emergency kit.
- Practice Regularly: Test your solar still-building skills in different environments to gain confidence.
- Supplement with Filters: While solar stills are effective, portable water filters and purification tablets provide extra peace of mind.
Building a solar still is an invaluable skill for anyone who spends time outdoors or wants to be prepared for emergencies. With just a few simple materials, you can harness the power of the sun to produce clean, drinkable water in even the most challenging conditions.
Whether you’re camping in the wilderness or navigating an arid survival scenario, a solar still can be the difference between dehydration and hydration. So grab a plastic sheet, dig a hole, and put your new survival skills to the test.


